

| |
SF2Mix | System | Select Screen | Characters | Download | |
Test Now |


| Directional Movements: | |||||||||
| Perfect Guard! |  Defend at the last moment Defend at the last moment
|
||||||||
 |
*Quick recovery, not lose Vigor, small life recovery, small vigor recovery | ||||||||
Guard Crush! |
Defend without having VigorBar
|
||||||||
 |
*It is paralyzed for a brief moment | ||||||||
Grab Escape |
Up + any button while grabbing |
||||||||
| *Necessary use 1/3 VigorBar | |||||||||
Escape |
START or  + +
 |
||||||||
| *Invincible while rolling | |||||||||
Backstep |
|
||||||||
| Run |  (can't grab)
 |
||||||||
| Low Jump |  (from IDLE State) (from IDLE State) |
||||||||
| Normal Jump | (different IDLE State) |
||||||||
| Long Jump |  (quickly)
or (from Run State) (quickly)
or (from Run State) |
||||||||
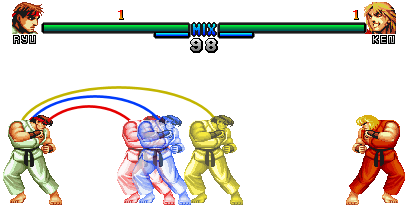 | |||||||||
| Character Swapping | Change characters during Rounds by holding Start + corresponding button | ||||||||


 (Hold Start + )
| Throw Moves: | |||||||||
| Seoi Nage | (close) / +  or or  |
||||||||
| Tomoe Nage | (close) / +  or or  |
||||||||
| Command Moves: | |||||||||
| Hadouken |  + +  |
||||||||
| Shoryuken |  + + |
||||||||
| Tatsumaki Senpuukyaku |  + or + or
|
||||||||
| *Goes through projectiles except Eletric Hadouken | |||||||||
| Kuchuu Tatsumaki Senpuukyaku |  + +  |
||||||||
| Extra Moves: | |||||||||
| Tatsumaki Senpuukyaku | + (Extra Hit) |
||||||||
| Vigor Moves: | |||||||||
| Eletric Hadouken (VigorBar >= 1/4) | +
(Extra Hit - 1/4 VigorBar) |
||||||||
| Fail Hadouken (VigorBar < 1/4) | +
(the hadouken does not come out) |
||||||||
| Double Eletric Hadouken | +  (1/2 VigorBar and delay for recover)
 |
||||||||
| *Necessary to hold the buttons in combos | |||||||||
| Awakening Evil Ryu | +  (Loses 1/3 health and Full VigorBar) (Loses 1/3 health and Full VigorBar) |
||||||||
| Awakening Evil Ryu (full clothes) |
+  (Loses 1/3 health and Full VigorBar) (Loses 1/3 health and Full VigorBar) |
||||||||
 (Hold Start + )
| Throw Moves: | |||||||||
| Tawara Nage | (close) / + |
||||||||
| Saba Ori | (close) / + |
||||||||
| Sekkan Kyaku | (close) / + |
||||||||
| Command Moves: | |||||||||
| Hiza Geri | (far) (Extra Hit) |
||||||||
| Hyakuretsu Harite |  + (
/ ) + (
/ )
|
||||||||
| Super Zutsuki | + |
||||||||
| Super Hyakkan Otoshi |  + + |
||||||||
| Vigor Move: | |||||||||
| Super Rage Zutsuki | + (1/2 VigorBar and delay for recover) |
||||||||
| *Cause Guard Crush when defended. | |||||||||
(Hold Start + )| Throw Moves: | |||||||||
| Wild Fang | (close) / + |
||||||||
| Command Moves: | |||||||||
| Rock Crush | (close) / + |
||||||||
| Electric Thunder | +
|
||||||||
| Rolling Attack | + |
||||||||
| L Second Rolling Attack | Hold (1/5 Vigorbar) |
||||||||
| L Cancel Rolling Attack | Hold (1/4 Vigorbar) |
||||||||
| Vertical Rolling | + |
||||||||
| Vigor Move: | |||||||||
| Electric Rolling Attack | + (1/2 VigorBar and delay for recover) |
||||||||
| L Spin Dash | Hold |
||||||||
| L Second Rolling Attack | Hold (1/4 Vigorbar) |
||||||||
| L Cancel Rolling Attack | Hold (1/4 Vigorbar) |
||||||||
 (Hold Start + )
| Throw Moves: | |||||||||
| Judo Throw | (close) / + |
||||||||
| Dragon Suplex | (close) / + |
||||||||
| Flying Mare | (close) + or |
||||||||
| Flying Buster Drop | (close) + or |
||||||||
| Command Moves: | |||||||||
| Knee Bazooka | / + |
||||||||
| Reverse Spin Kick | / + |
||||||||
| Sonic Boom | + or |
||||||||
| Flash Kick | + |
||||||||
| New Moves: | |||||||||
| Vertical Sonic Boom | + (Extra Hit) |
||||||||
| Vigor Move: | |||||||||
| Rolling Sobat | hold + |
||||||||
| (1/3 VigorBar) *Jump projectiles except Eletric Hadouken | |||||||||
| Double Flash Kick | + (1/2 VigorBar and delay for recover) |
||||||||
 (Hold Start + )
| Throw Moves: | |||||||||
| Seoi Nage | (close) / + or |
||||||||
| Tomoe Nage | (close) / + or |
||||||||
| Command Moves: | |||||||||
| Hadouken | + |
||||||||
| Fake Hadouken | +
(fast recovery) |
||||||||
| Fire Shoryuken (VigorBar > 0) | + |
||||||||
| Shoryuken (VigorBar = 0) | + |
||||||||
| Tatsumaki Senpuukyaku | + |
||||||||
| L Final Kick | |
||||||||
| *Goes through projectiles except Eletric Hadouken | |||||||||
| Kuchuu Tatsumaki Senpuukyaku | + |
||||||||
| Vigor Moves: | |||||||||
| Fire Hadouken (VigorBar >= 1/3) | +
(Extra Hit - 1/3 VigorBar) |
||||||||
| Fail Hadouken (VigorBar < 1/3) | +
(the hadouken does not come out) |
||||||||
| Super Fire Shoryuken | +
(1/2 VigorBar and delay for recover) |
||||||||
| *Necessary to hold the buttons in combos | |||||||||
| Awakening Violent Ken (White Hair) |
+ (Loses 1/3 health and Full VigorBar) |
||||||||
| Awakening Violent Ken (without changing the kimono) |
+ + (Loses 1/3 health and Full VigorBar) |
||||||||
| Awakening Violent Ken (Yellow Hair) |
+ + (Loses 1/3 health and Full VigorBar) |
||||||||
| Awakening Violent Ken (Blue Hair) |
+ + (Loses 1/3 health and Full VigorBar) |
||||||||
 (Hold Start + )
| Throw Moves: | |||||||||
| Koshuu Tou | (close) / + or |
||||||||
| Ryuusei Raku | (close) / + or |
||||||||
| Command Moves: | |||||||||
| Sankaku Tobi | Jump against a Wall, press in opposite direction. | ||||||||
| Kouhou Kaiten Kyaku | / + |
||||||||
| Kaku Kyaku Raku | / + (Extra Hit) |
||||||||
| Air Back Flip | + (Extra Hit) |
||||||||
| Yousou Kyaku | + |
||||||||
| Hyakuretsu Kyaku | + |
||||||||
| Kikouken | + |
||||||||
| Spinning Bird Kick | + |
||||||||
| *Goes through projectiles except Eletric Hadouken | |||||||||
| L Cancel Spinning Bird Kick | Hold (1/4 Vigorbar) |
||||||||
| New Moves: | |||||||||
| Air Spinning Bird Kick | + |
||||||||
| Double Kick | + |
||||||||
| Vigor Move: | |||||||||
| Focus Kikouken | +
(1/2 VigorBar and delay for recover) |
||||||||
 (Hold Start + + )
| Throw Moves: | |||||||||
| Piledriver | (close) / + |
||||||||
| Brain Buster | (close) / + |
||||||||
| Deadly Driver | (close)  / /  + + |
||||||||
| Leg Throw | (close) / + |
||||||||
| German Suplex | (close) / + |
||||||||
| Thunder Fire Powerbomb | (close) / + |
||||||||
| Command Moves: | |||||||||
| Iron Claw | / + |
||||||||
| Kamitsuki | / + |
||||||||
| Stomach Claw | / + or |
||||||||
| Kuuchuu Headbutt | + or |
||||||||
| Flying Body Attack | + |
||||||||
| Quick Lariat | + (move / long distance) |
||||||||
| Double Lariat | + (move / short distance) |
||||||||
| Screw Piledriver | (close)  + + |
||||||||
| New Move: | |||||||||
| Hopak Kick | + (move / long distance) |
||||||||
| Vigor Move: | |||||||||
| Super Screw Piledriver | (close) +  (3/4 VigorBar and delay for recover)
 |
||||||||
 (Hold Start + + )
| Throw Moves: | |||||||||
| Yoga Smash | (close) / + |
||||||||
| Yoga Throw | (close) / + |
||||||||
| Command Moves: | |||||||||
| Yoga Mummy | + |
||||||||
| Yoga Spear | + (Extra Hit) |
||||||||
| Yoga Fire | + |
||||||||
| Yoga Flame | + |
||||||||
| Yoga Teleport Forward | +
|
||||||||
| Yoga Teleport Backward |  + +
|
||||||||
| New Moves: | |||||||||
| Air Yoga Teleport Forward | +
|
||||||||
| Air Yoga Teleport Backward | +
|
||||||||
| Vigor Move: | |||||||||
| Double Yoga Fire | + (1/2 VigorBar and delay for recover) |
||||||||
| *Necessary to hold the buttons in combos | |||||||||
 (Hold Start + + )
| Throw Moves: | |||||||||
| Head Bomber | (close) / + or |
||||||||
| Command Moves: | |||||||||
| Dash Straight | + |
||||||||
| Dash Upper | + |
||||||||
| Turn Punch | Hold or and release |
||||||||
| New Moves: | |||||||||
| Dash Ground Straight | + |
||||||||
| Buffalo Headbutt | + (Extra Hit and goes through projectiles) |
||||||||
| L Final Attack | or |
||||||||
| Vigor Moves: | |||||||||
| Punch Machine | + (1/2 VigorBar and delay for recover) |
||||||||
| *Necessary to hold the buttons in combos | |||||||||
| You Can Fly | + (1/2 VigorBar and delay for recover) |
||||||||
| *Necessary to hold the buttons in combos | |||||||||
 (Hold Start + + )
| Throw Moves: | |||||||||
| Rainbow Suplex | (close) / + or |
||||||||
| Stardust Drop | (close) / + or |
||||||||
| Command Moves: | |||||||||
| Sankaku Tobi | Jump against a Wall, press in opposite direction. | ||||||||
| Rolling Crystal Flash | + |
||||||||
| Flying Barcelona Attack | + , then |
||||||||
| Hang on the Grid | + (only in the Vega scenario) |
||||||||
| Izuna Drop Attack | + , then (close) / + |
||||||||
| New Moves: | |||||||||
| Scarlet Kick Attack | + |
||||||||
| Remove the Claw |
(Recover 1/4 VigorBar) |
||||||||
| Vigor Moves: | |||||||||
| Elemental Fire Claw |
(1/2 VigorBar and delay for recover) |
||||||||
| With Claw | *Increases Claw damage and causes damage to the defence | ||||||||
| Reserve Claw |
(1/2 VigorBar and delay for recover) |
||||||||
| Without Claw | |||||||||
 (Hold Start + + )
| Throw Moves: | |||||||||
| Tiger Carry | (close) / + or |
||||||||
| Command Moves: | |||||||||
| Tiger Shot | + |
||||||||
| Ground Tiger Shot | + |
||||||||
| Tiger Uppercut | + |
||||||||
| Tiger Knee Crush | + |
||||||||
| Extra Moves: | |||||||||
| Tiger Knee Crush | + (Extra Hit) |
||||||||
| Vigor Move: | |||||||||
| Quick Tiger Knee | +
(1/2 VigorBar and delay for recover) |
||||||||
 (Hold Start + + )
| Throw Moves: | |||||||||
| Deadly Throw | (close) / + or |
||||||||
| Command Moves: | |||||||||
| Psycho Punch | or (causes damage to defense) |
||||||||
| Air Psycho Punch | (Extra Hit and causes damage to defense) |
||||||||
| Psycho Crusher | + |
||||||||
| L Cancel Psycho Crusher | Hold (1/4 Vigorbar) |
||||||||
| Double Knee Press | + |
||||||||
| Head Press | + , then (Somersault Skull Diver) |
||||||||
| Vigor Moves: | |||||||||
| Air Psycho Crusher | + (1/5 VigorBar and delay for recover) |
||||||||
| L Cancel Air Psycho Crusher | Hold (1/4 Vigorbar) |
||||||||
| Hyper Psycho Crusher | + (1/2 VigorBar and delay for recover) |
||||||||
| *Autoguard - Defends automatically if hit. | |||||||||

| Throw Moves: | |||||||||
| Seoi Nage | (close) / + or |
||||||||
| Tomoe Nage | (close) / + or |
||||||||
| Command Moves: | |||||||||
| Fire Hadouken | +
(Extra Hit) |
||||||||
| Fake Hadouken | +
(fast recovery) |
||||||||
| Shoryuken | + |
||||||||
| Tatsumaki Senpuukyaku | + or
|
||||||||
| *Goes through projectiles except Eletric Hadouken | |||||||||
| Kuchuu Tatsumaki Senpuukyaku | + (Extra Hit) |
||||||||
| Extra Moves: | |||||||||
| Tatsumaki Senpuukyaku | + (Extra Hit) |
||||||||
| Vigor Moves: | |||||||||
| Ashura Senku | + (3/16 VigorBar and delay for recover) |
||||||||
| Double Fire Hadouken | +
(1/2 VigorBar and delay for recover) |
||||||||
| *Necessary to hold the buttons in combos | |||||||||

| Throw Moves: | |||||||||
| Seoi Nage | (close) / + ou |
||||||||
| Tomoe Nage | (close) / + ou |
||||||||
| Golpes: | |||||||||
| Hadouken | + |
||||||||
| Fake Hadouken | +
(fast recovery) |
||||||||
| Psycho Shoryuken | + |
||||||||
| Tatsumaki Senpuukyaku | + |
||||||||
| L Final Kick | |
||||||||
| *Goes through projectiles except Eletric Hadouken | |||||||||
| Kuchuu Tatsumaki Senpuukyaku | + |
||||||||
| Golpes com Vigor: | |||||||||
| Psycho Hadouken | +
(Extra Hit - 1/4 VigorBar) |
||||||||
| Rasetsukyaku | + (3/16 VigorBar and delay for recover) |
||||||||
| Super Rasetsukyaku | +
(1/2 VigorBar and delay for recover) |
||||||||
| L Super Psycho Shoryuken | |
||||||||